
Mark Rippetoe is the author of the Starting Strength method. This strength training method is the most succesfull way to increase your strength levels, and it’s suitable for all audiences: children, adults, and seniors; men and women; and those with fitness goals or those looking to improve athletic performance. It’s important to mention that for performance athletes, this is probably the best method for improving basic strength levels during their general physical conditioning period and during their off-season.
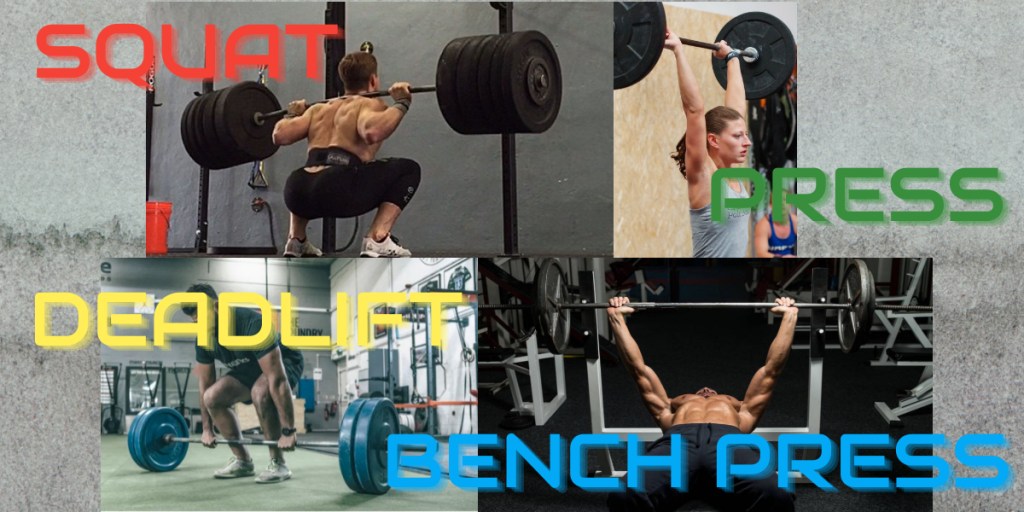
The basic lifts that are part of the Starting Strength model are five: the squat, the deadlift, the press, the bench press and the power clean. In the first part of this article, you will learn the technical execution of the first four lifts.
“Everyone can get and stay strong, but this requires work,
Mark Rippetoe
and excuses are easier than squats and deadlifts.”
“Actual progress in the weight room is based on
an increase of the loading of the basic structural exercises,
not in the number of different ways you can perform a triceps press down.”
LEARNING TO SQUAT
We will approach the squat in two phases: first unloaded, to solve problems associated with the bottom position, and then loaded, to learn how to apply the bottom position to the hip drive used for heavier weights. Since the majority of the problems with the squat happen at the bottom, this method expedites the process quite effectively.
Generating hip drive
We will use a fairly neutral foot placement, with the heels about shoulder width apart and the toes pointed out at about 30 degrees. Many people will assume a stance with toes pointed too forward, so you may need to point them out more than you want to.
You are going to assume the position you will be in at the bottom of a correct squat, without the bar.
- Squat down, all the way, to a position in which the apex of the hip crease drops just below the top of the patella.
- Put your elbows against your knees, with the palms of your hands together, and shove your knees out.
- Notice your feet are flat on the floor, your knees are shoved out to where they are in a parallel line with your feet, and just a little in front of your toes.
- Your back should be as flat as you can get it. Also notice that your back is inclined at about a 45-degree angle, not at all vertical.
- And your eyes are looking down at the floor a few feet in front of you.
After you’ve established the bottom position, come up out of the bottom by driving your butt straight up in the air. Up, not forward, not back. This movement keeps your weight solidly over the whole foot instead of shifting it to the toes. Think about a chain hooked to your hips, pulling you straight up out of the bottom.
Adding the bar
Set the rack height so that the bar is at about the level of your mid-sternum.
Take an even grip on the bar, measured from the markings placed on the bar for this purpose. A standard power bar has 16-17 inches between the ends of the outside knurl, and 32 inches between the finger marks. Grip width for the squat will vary with shoulder width and flexibility, but in general, the hands will be between these two markings with the narrowest grip you can manage. A narrower grip allows a flexible person to better support the bar with the posterior muscles of the shoulders, and a wider grip allows an inflexible person to get more comfortable under the bar. The thumbs should be placed on top of the bar so that the wrists can be held in a straight line with the forearms. The elbows should be lifted up to trap the bar between the hands and the back. Elbows should be up but not high.
With your grip in place, and your hands and thumbs on top of the bar, dip your head under the bar, and come up into position with the bar on your back, just below the spine of the scapula, the bone you feel at the top of the shoulder blades, and then secure it in place by lifting your elbows and chest at the same time. It should feel as though the bar is resting on a “shelf” under the traps and on top of the posterior deltoids.
Take the bar out of the rack in the same position in which it is to be squatted, with the torso and shoulders tight, the chest and elbows up, the head position down, and both feet under the bar.
Step back just enough to clear the rack and assume the same stance you used earlier. Again, heels should be about shoulder width apart, with toes pointed out about 30 degrees.
At this point, you are ready to squat with the empty bar. Everything you are about to do is the same as you did unweighted. Only two things are different:
- One, you don’t have your elbows available to help push your knees out, so you need to do this with your brain.
- And two, don’t stop at the bottom. Just go down and immediately come back up, driving your butt straight up, not forward, not back, out of the bottom.
Now, look down at a spot on the floor about 4-5 feet in front of you, take a big breath and hold it, and squat.
You should be in good balance at the bottom of the squat, with your weight balanced evenly over your feet. Neither on your heels, nor forward on your toes. Balance problems usually indicate a back angle that is too vertical. Remember that the back angle will not be vertical at all; sit back, lean forward, shove your knees out, point your nipples at the floor, allow your hips to perform the squat, not your legs. Do not accept anything less than full depth, ever. If you are high, it is usually because your knees are not out. Most people who have problems with the squat do not shove their knees out enough.
Do a set of five and rack the bar. Walk forward until the bar touches the vertical parts of the rack. Find the uprights, not the hooks. You can’t miss the uprights, and if you touch them, you’ll be over the hooks.
The general plan is to do a couple more sets of five reps with the empty bar to nail down the movement pattern, and then add weight, do another set of five, and keep increasing in even increments until the next increase would compromise your form. And that is the first squat workout.
“There is simply no other exercise, and certainly no machine, that produces the level of central nervous system activity, improved balance and coordination, skeletal loading and bone density enhancement, muscular stimulation and growth, connective tissue stress and strength, psycological demand and toughness, and overall systemic conditioning than the correctly permormed FULL SQUAT.”
Mark Rippetoe
“In the absence of an injury that prevents its being performed,
everyone who lift weights should learn to squat, correctly.”
“The only three certainties in life are deadth, taxes and squats.”
“There is never an absolute answer to everything,
except of course you have to do your squats.
The longer you train, the more you realize how true this is.”
LEARNING TO PRESS
The press starts at the rack with the empty bar. It should be set at the same height as for the squat, at about the middle of the sternum.
The grip width for the press is such that it places the forearms in a vertical position as seen from the back or front. The grip should position the bones of the forearm directly under the bar. The best way to position the grip efficiently is to set the grip width at your index fingers, and then rotate your hands into pronation by pointing your thumbs down toward your feet. Then, just lay your fingers down on the bar and squeeze the fingertips into the knurl of the bar.
Next, take the empty bar out of the rack. Your grip will have placed the bar on the heel of your palms, directly over your forearm, and your elbows should now move to a position just in front of the bar when viewed from the side. Take a comfortable stance. Your squat stance actually works quite well for the press. Look straight ahead to a point on the wall that is level with your eyes. Stare at that point for the whole set. Now lift your chest by placing the upper part of the erector spinae in contraction. Think about lifting your sternum up to your chin. With the chest and elbows up you are ready to press the bar.
The press is learned in two stages:
- First, you´ll put the bar where it´s going to be in the finished lockout position.
- Second, you will learn how to get the bar there correctly by producing a mechanically efficient bar path using the whole body.
Step 1
Take a big breath, hold it, and drive the bar up over your head. Make sure that you have the bar directly above the shoulders, a point above the back of your neck. Once the bar is over your head correctly, lock your elbows and then shrug your shoulders up to support the bar.
Step 2
After this lockout position is correct, it´s now time to learn how to best drive the bar up into this position. Since the bar is sitting in front of the neck, and it must move up to a position above the shoulder joints, there must be a relative horizontal movement of several inches on the way up. But barbells like to travel in straight vertical lines, especially when they’re heavy. Our vertical bar path must therefore be produced in a way that takes the load from a position in front of the shoulders to the lockout position directly above the shoulder joints. We do this with a motion of the hips.
- First, with your hands on your hips, squeeze your quads tight to lock the knees hard in extension, and then squeeze your abs tight. This squeezing from the rib cage all the way down to defeat create a band of tension that we will use to create a rebound. Push your hips forward so that your weight goes on to your toes. This movement must no be produced by bending the knees or the lower back. One this movement is successfuly created by moving the hips, push into it fast and feel the rebound as you reach the high of the tension. Your weight should shift to the toes and then back to midfoot as you recenter after the rebound.
- Take the empty bar out of the rack and repeat the same motion with the bar in your hands. Done correctly, you will notice the bar drop a little at the forward step of the hip bridge, and the bar rebounding upward as your hips bounce back. Bounce the bar several times, and then catch the upward bounce and drive the bar to lockout. The press takes place after the hips are rebounded of the front of the tension, not before. As soon as the bar crosses the top of your forehead, get under the bar. Don’t move the bar back – slam yourself forward under the bar. To further reinforce the vertical bar path, think about keeping the bar close to your face on the way up. Aim for your nose as the bar leaves your shoulders. Then, as you lower the bar for the next rep, aim for your nose on the way down as well.
- Do this for a set of five, and rack the bar. Do as many sets as necessary with the empty bar to clarify the concept of bouncing back off of the anterior tension and moving yourself forward under the bar. After as much practice with the empty bar as is necessary, start up in 5-, 10-, or 20-pound jumps, whatever is appropriate for your age and strength, until the bar speed begins to slow markedly on the fifth rep of the set, and call it a workout.
“The press is the most useful upper-body exercise for sports conditioning, primarily because it is not just an upper-body exercise.“
Mark Rippetoe
“Strong shoulders are healthy shoulders, and the best way to make them strong is to use them correctly, by pressing the barbell overhead.”
“The vast majority of humans on this planet have never had to push really, really hard on anything, and that is a skill that should be developed,
along with cooking, critical thinking and interpersonal skills.“
LEARNING TO DEADLIFT
This method for learning the deadlift proceeds in five steps.
Step 1: Stance
The stance for the deadlift is about the same as the stance for a flat-footed standing vertical jump, about 8-12 inches between the heels, with the toes pointed slightly out.
The bar should be 1-1,5 inches from your shins. For almost every human being on the planet, this distance places the bar directly over the middle of the foot, the position over which the bar stays on its way up to lockout.
The angle of the toes will be at least 10 degrees and maybe as much as 30 degrees.
Step 2: Grip
After you have assumed the correct stance, grip the bar, double-overhand, and thumbs around, at a width that places your hands in a position close to your legs, without being so close that you rub your thumbs against them as you pull.
Take your grip on the bar by bending over at the waist, stiff-legged, without bending the knees or lowering the hips.
Most important at this point and for the following steps is that you do not move the bar. You have gone to considerable trouble to place the bar directly above the mid-foot, and if you move it during this or any subsequent steps, you will have undone step 1.
Step 3: Knees forward
With your grip secure, bend your knees and drop them forward just to the point where the shins touch the bar. Again, do not move the bar.
Now shove your knees out just a little, so that they are in contact with the elbows and are parallel to your feet.
Remember: do not lower your hips, do not move the bar.
Step 4: Chest up
This will be the most difficult step for most people.
Squeeze your chest up into the deadlift start position. While gripping the bar, shove your rib cage up so that your chest rotates up between your arms. Let this contraction continue down your back until your lumbar spine is tightened into contraction as well.
When you are in the correct position, stare at a point 12-15 feet in front of you on the floor so that your neck can assume its normal anatomical position. You might need to think about keeping your chin down.
This step will be difficult because of hamstring tension. Remember: The back muscles and the hamstrings are in war for control over your pelvic position, and the lower back must win. Your hips will probably be higher than you want them. That´s just fine.
After you do a few deadlifts and your hamstrings get warm, the movement will feel better and more familiar.
Step 5: Pull
Take a big breath and hold it. Remember: air is support for your back.
And then drag the bar of your legs. This means exactly what it says: “drag” implies contacts, and the bar never leaves contact with your legs on the way up to lockout at the top. Done correctly, the bar path will be a straight vertical line, starting at its position directly over the mid-foot and ending at the top at arms´ length with your chest up, knees and hips in extension, spine in the normal anatomical position, your eyes looking slightly down and your shoulders back.
Down should be the perfect opposite of up. Be sure that you lower the bar by first unlocking your hips and knees, and then shoving your hips backward and letting the bar slide down your thighs in a straight vertical line. As the bar passes your knees, you may bend them to finish setting the bar down, never unlocking the bar.
Pull a set of five, concentrating especially on your back position and keeping the bar close to your legs. If you´re sure your form is good enough, add weight for a few sets until it feels like the next increase might be a problem, and that´s the first deadlift workout.
“The deadlift also serves as a way to train the mind
Mark Rippetoe
to do things that are hard.”
LEARNING TO BENCH PRESS
When you’re learning how to bench, it might be prudent to use a spotter if one is available. However, if you are working inside a correctly set-up power rack, a spotter is not absolutely necessary.
- Start with an empty bar. Lie down on the bench with your eyes looking straight up. In this position, you should be far enough down from the bar, meaning toward the foot end of the bench that when you look up your eyes are focused on the down side of the bar.
- Your feet should be flat on the ground in a comfortable spacing comparable to the squat stance, with your shins approximately vertical. Your upper back should be flat against the bench, with your lower back in an anatomically normal arched position.
- Take an overhand grip on the bar. Your grip should be somewhere between 22 and 24 inches, measured between the index fingers. This grip width will result in a vertical forearm for most people when the bar is touching the chest at the bottom. The bar should rest on the heel of your palm (not on the fingers), and directly over the bones of the forearm, just like the press. This grip is best accomplished by pronating your hands, with a slight internal rotation of your arms.
- You are now ready to take the bar out of the rack. Look directly up at the ceiling and push up on the bar, locking out your elbows. Move the bar out to a position directly over the line of your shoulder joints. This is the place where the bar is in balance at lockout. Note carefully the position of the bar against the ceiling. This picture is your reference for the path the bar will take as you move it down and up.
- You will lower the bar to your chest, touch the chest, and then drive the bar right back to the exact position you are looking at on the ceiling ovehead. Stare at the place on the ceiling where the bar is to go. Do not watch the bar as it moves.
- With the bar locked out over the shoulders, have your spotter touch your chest a few inches below the bar’s vertical position, at about the middle of your sternum. This tactile cue will quite effectively identify the point on your chest to touch the bar. If there is no spotter and you are benching alone inside a rack, unlock your elbows and then allow them to drop towards your feet a little on the way down. If you do this correctly, the net effect will be the same as the spotter’s touch – the bar will contact your sternum a few inches below your clavicles, and therefore below your shoulder joints.
- Look at the ceiling, unlock your elbows, lower the bar to the chest, touch it without stopping, and drive the bar back at the point on the ceiling your eyes have trapped. Try it for a set of five reps. You’ll notice immediately that if your eyes don’t move from their fixed position, the bar will go to the same place every rep.
- Do another set of five with the bar, reinforcing your eye position, and then rack the bar. This is done with locked elbows, after the last rep is finished. Should you have a spotter, this movement back to the rack should be covered.
Now that we´ve covered the basic movement pattern for the bench press we can maximize the efficiency of the lift by improving the position of the upper back, legs and feet.
- The upper back needs to be planted firmly against the bench and used as a platform to drive against while the arms drive the bar up. When this is done correctly, the shoulder blades will be adducted, or pinched together. Sit on the bench in the same position you assumed before lying down to take the bar. Imagine a hand touching you rigth between the shoulder blades, and imagine pinching the hand between your shoulder blades. This pinching will also cause you to raise your chest further contributing to a good position. Now, lie down, take the bar out and asume this same position. Making sure your shoulder blades are pinched together and your chest is up high. Your goal is to be able to do all your reps without losing this set position against the bench.
- Used correctly the legs drive against the floor during the bench press, transferring force horizontally along the bench through the hips into the arched back to reinforce the arch, and keep the chest in its high position. Remember that you cannot raise your butt up off of the bench at any time during the bench press.
- Your foot position should be set so that your shins are nearly vertical. This position allows for the efficient use of your legs in reinforcing the arch, but it doesn´t predispose you to bridge your butt up off of the bench. The proper position for the feet is flat against the floor, so that the heels can be used as the base of the drive up the legs. If you´re up on your toes, you cannot use the force of the knee extension nearly as efficiently as you can if your heels are planted.
For the next sets of five reps, add a little weight until the bar speed begins to slow down and your form starts to change. Stay at that weight for two more sets of five, and this is the first workout.
Bibliographic references:
- Rippetoe M. (2011). Starting Strength: Basic Barbell Training, 3rd Edition. The Aasgaard Company.
- Starting Strength. (2018). Learning to Squat | The Starting Strength Method [Video file]. YouTube. https://youtu.be/nhoikoUEI8U?si=cQoQ2g5a_q7pHQJY
- Starting Strength. (2020). Learning to Press | The Starting Strength Method [Video file]. YouTube. https://youtu.be/8dacy5hjaE8?si=pQb2aKAtWo5UkDC9
- Starting Strength. (2020). Learning to Deadlift | The Starting Strength Method [Video file]. YouTube. https://youtu.be/p2OPUi4xGrM?si=dnV7oNJw48oiUnZa
- Starting Strength. (2020). Learning to Bench Press | The Starting Strength Method [Video file]. YouTube. https://youtu.be/rxD321l2svE?si=OiAHHCXh2b_CzSHX

Leave a comment