
If you want to run faster, you have to apply more force down to the ground. One of the best ways to maximize your force production is to develop great frontside mechanics. So what are frontside mechanics? How are they different from backside mechanics? Can you gain one and lose another? Which one do you want? What does that all mean and how does it relate to speed? So what I want to do with this post is give a good overview of what frontside and backside mechanics are, and why they’re important. And then I´m going to give you some really great drills that you can do to develop your frontside mechanics.
Front Side Mechanics
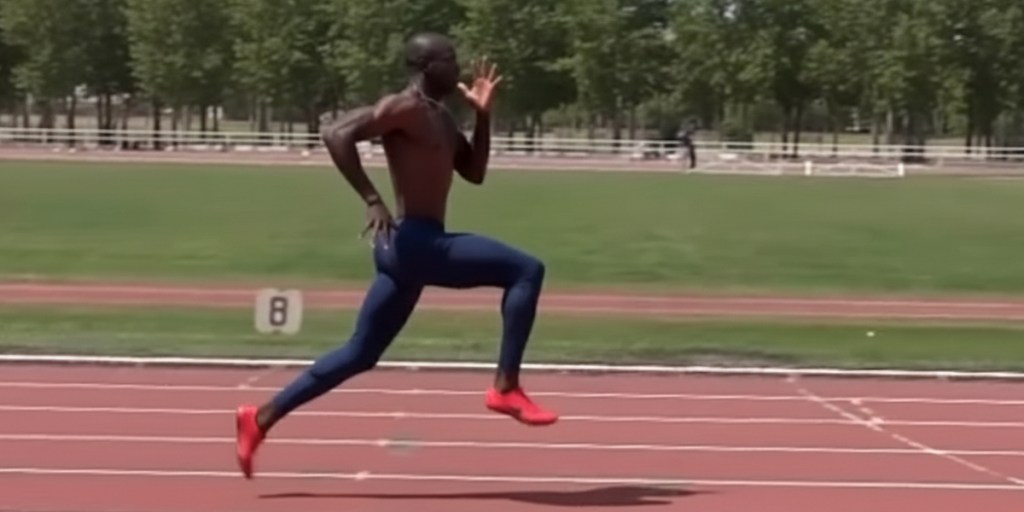
Frontside mechanics are everything that happen in front of the hips, and it’s where we generate power. So two things happen when we lose frontside mechanics, and the only way we can lose it is to gain backside mechanics. In our frontside mechanics:
- We drive the knee forward, which creates movement horizontally.
- We push the foot back into the ground, which then creates power and more horizontal movement.
The reality is that the better that foot comes off the ground, the quicker the time in the air, the less time on the ground. But it’s also how much power you’re creating.
Less air time = Less ground time
When an athlete finds backside mechanics and everything starts to what coach Ken Harnden says “go out the back”, there’s a reverse crescent moon. So the athlete is bringing the foot back, bring it forward and putting it down. Ultimately when they do that, they create a much longer movement through the air, and correspondingly, if one foot’s in the air, the other foot has to be in the ground. So something has to be keeping you up. If the foot is back there and it’s going through this whole loop, it’s gotta wait. Now it can come off the ground. It’s a vicious circle. We are trying to maintain postural integrity, and the better you maintain these positions (this triple extension), the less you will find backside mechanics.
Good posture and triple extension prevents backside mechanics.
Drills like the U-drill, the 2-point drill, low heel recovery drill… are going to enhance your ability to find frontside mechanics. We will move into wickets in the next phase of our race. Again, a great way to teach frontside mechanics. The athlete is forced to lift the foot up in the front in a max velocity state in order to to get over the top of the wicket, and that, then, will promote that frontside mechanics.
Ultimately, what makes an athlete good to great or great to wonderful, or whatever the step is, the hip girdle has to be strong enough to balance all of the upper body and the weight of your head and your arms with what’s happening down below. So everything we do like hurdle walkovers, core work, med ball tosses… has to be focused in some part in this hip girdle area. So as you go to the weight room and you’re doing cleans and snatches, it has to be focused on that core. The form has to be correct in order for us to be efficient and successful.
In backside mechanics, as your foot comes up and gets through, it’s landing in front of your center of mass. If it lands in front of the center of mass, the only way you can go is straight up, and you’ve lost your ability to push down the track.
In frontside mechanics, one of the things you want you to pay attention is not just where the foot strikes, but how low the heel recovery is. The foot comes off the ground and immediately pulls forward. There’s no wasted motion going up in back. We used to call it butt kicks. When coach Ken Harnden was growing up, he used to practice butt kicks. In the warm-up he was practicing butt kicks putting their hands on his butt and touch them. Coach Ken Harnden will never ever teach that again because we want frontside mechanics. We want the ability to create power. As a coach and as an athlete the most simple way to understand that is, if you stand up and you want to create power from this position, the easiest way to do it is push in the ground. You cannot create power from behind. This is not a powerful position. You take your athlete, lean them up against the fence and say: “How do you create power from here?”. They can’t because they’ve disengaged all the major muscle groups.
Drills to Develop Frontside Mechanics
#1 – U Drill
Stand up in a 2-point position. Form a “U” with your hands. Keep your head up looking through the “U”. You´re going to do a 2-point start. What that drill does is:
- It forces you to keep the chin up.
- It forces you to keep the chest up.
Lift your arms parallel to the floor. A follow on to it is because your center of mass is in a great position and you don’t use the arms for balance and power. You´re forced to a frontside position. You cannot come out the back. It’s not possible from this position. So it’s a great drill.
#2 – Wall Drill
Wall drill is a great drill to work on front side mechanics for an athlete. We know that most athletes are pretty weak in the hip flexor. It’s a small muscle group that’s hard to target. So what we do is we take the athlete and put them in our acceleration position up against a wall to allow for them to hold that position a little bit longer and do the drill.
So lean up against the wall. You don’t want to be too low. You don’t want to be too high. You want a nice straight line about 45º to make sure you maintain in postural integrity at the hip. You are going to do a walking drill with frontside mechanics. So pull the foot up. The foot stays dorsiflexed the whole time. It’s pushing back into the ground and landing on the ball of the foot, not the toe. Ball of the foot is where you get strength. Notice a couple of things:
- Your eyes are looking straight forward at the wall.
- You´ve got a straight line through your body.
- Your eyes are 90º to that body line.
Now you´re going to do it a little bit faster.
When we do this drill, we have a chance to show our athlete where we want the impact into the ground. We don’t want that impact to be way back where the body collapses, and we don’t want it to be too far in front where it forces us out of our acceleration drive position.
It´s a great drill to do. You can put athletes up on the wall. Coach Ken Harnden strongly suggests you go one athlete at a time, so you can focus on technique. It’s really important to get this right.
Focus points
- Eyes 90º to body line.
- Body about 45º ➔ Good hip position.
- Foot stays dorsiflexed.
Now we´re going to discuss a couple of common mistakes that we see when an athlete tucks the hips under and sits like that because they’re not strong enough to get a neutral position. We see an athlete drop his chin and you notice they immediately drop the hips. Those are common mistakes. One of the other things we see is athletes trying to find the ground, so they start to point the toe and reach for the ground. We really want to make sure that that foot is dorsiflexed and creating a really nice position. What you’ll notice when you watch from the side is when the foot is dorsiflexed, you’ll see 90º at the ankle on impact. That means we’ve got a nice straight line through our body, and we can pull up and hold the foot in that position. So focus on those three things as your athlete does the drill.
Common errors
- Chin and eyes down = Bad posture.
- Hips tucked = Loss of power.
- Toes down = Poor ground contact.
#3 – Med Ball Drill
We’re going to add our basic drills, A- Skip and B-Skip, here and we’re going to employ a med ball. The med ball is going to allow us to change the center of mass slightly. The med ball moves it forward a little bit, which forces the athlete to hold that position while under stress and strain. It’s a great drill just for general strength. It’s a great drill to work on the hip girdle which, we know, is super important. And it’s a great drill to take the arms out of the equation and force the lower body to do just a little bit more work.
Our goals here again are 90º angles ankle, knee and hip, and the ability to stay tall at the hip. Keep that postural integrity. Hold the body up, stay on the toes, and be up here in a great position even under the stress of having an 8 pound med ball. You´re going to do an A-Skip and a B-Skip version of this just working on those angles in those positions, driving the foot in the ground, holding on to your dorsiflexion, and allowing the foot contact to be right underneath the hip even holding a med ball.
- 90º ankle, knee and hip.
- Foot contact under hip.
So when you’re doing this, everything’s about your hip girdle. This is that center layer of the cake. It’s what holds the whole thing together. It´s what allows you to be in a great position to sprint in. So anything you can do to improve that to make it stronger is fine, and it’s not the pretty abs that you go to the beach with these, but the lower back and the upper glutes. These are the ones underneath that actually hold you in position, and there’s a ton of exercises you can do just with a med ball, whether it’s med ball tosses against a wall, throws for a height… Anything you can do that involves some explosiveness using the core to make you stronger and allow you to sprint in a better position is going to make you better every day.
Summary
Frontside mechanics are how you produce maximum power and ultimately sprint faster. Great frontside mechanics are critically important in sprinting because they help to optimize your speed and efficiency. Frontside and backside mechanics are terms that are thrown around a lot. However, despite how common they are, there seems to be a bit of confusion as to what they mean and how they relate to speed.
When sprinting, your frontside mechanics refer to everything that happens in front of the hips. Proper frontside mechanics involve driving the knee forward and up towards the chest (strong hip flexors), which allows you to generate greater force and maintain a stable core position. When you develop proper frontside mechanics, you can increase the length of your stride and generate greater power with less effort. This leads to a more efficient and faster sprinting motion, which results in a significant increase in speed.
In contrast, backside mechanics involve a more inefficient movement pattern where your legs move backwards behind your body in a reverse crescent moon movement. This can cause you to loose power, and increase ground time. Backside mechanics can also cause you to land in front of your center of mass which limits your ability to push down the track.
In this post, you are provided with a complete overview of frontside and backside mechanics from the perspective of Olympic coach Ken Harnden. You’ll get actionable tips to improve your sprinting form as well as 4 super effective drills that will help you develop great frontside mechanics.
One of the quickest ways to improve sprinting mechanics and get faster is wall drills. Proper front side mechanics are absolutely essential for speed development and maximum velocity sprinting. In this post we break down some wall drills and how to perform them to optimize front side mechanics. You’ll learn proper body angles, optimal head and hip positions and how to progress from marching to faster movements. When done properly, the technique that you develop on the wall will translate directly to the track. You’ll also get tips on how to identify and fix the most common errors athletes make while doing these drills. If you are looking for a straightforward way to increase speed, you’ll love these drills.
Bibliographic references:
- Outperform. (2023). The Fastest Way to Improve Your Sprinting Mechanics [Video file]. YouTube. https://youtu.be/QdTuopJG8FE?si=sLfUxXhm10DZ-2ex
- Outperform. (2022). Sprinting Drills That ACTUALLY WORK! (Front Side Mechanics) [Video file]. YouTube. https://youtu.be/Jea-ntTafrM?si=og9PXhwnwEeph-nn

Leave a comment