
In this post I’m going to explain how to build a weightlifting platform. But first I’m going to tell you all the advantages that this structure will bring to your home gym:
- Protects your garage floor.
- Protects your equipment.
- Makes lifting safer.
- Makes lifting quieter.
If you browse the Internet, all the websites of commercial companies show exorbitant prices: 4 figures!!! Around 1000 dollars, 2000 dollars or even more. There are also models for 600 and $800, but their dimensions are smaller and they are only for deadlifts. If you still want to have a weightlifting platform at home, perhaps the best option is to make it yourself to reduce costs.
Building a lifting platform is relatively cheap and ridiculously easy. Below I’m going to show you one of the possible ways to build a weightlifting platform. The cost of all the material will cost you around $500 in total, including shipping costs. Of course, the price difference is obvious compared to buying a ready-made one. Obviously, if you pick it up at the point of sale you will save on shipping costs, but bear in mind that you will need a van or something similar to be able to transport the almost 2.5 metre long wooden boards to your house.
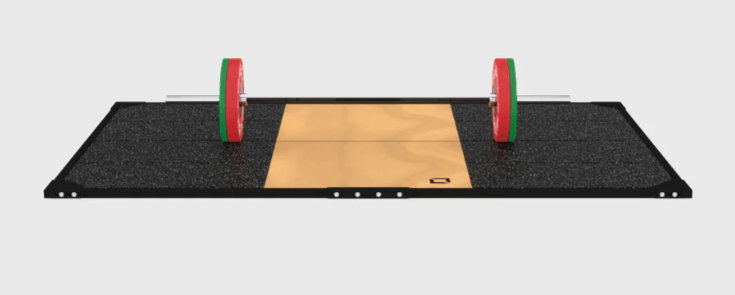
This project will only take you about one to two hours to build. When you’re done, you’ll have a platform that measures 8´x 8´(or 244 cm x 244 cm).
Note: A weightlifting platform will raise you two inches off the ground. Make sure you have enough space above you to accommodate this. The last thing you want is to set up a platform and realize you don’t have enough height in your garage when your plates come through the ceiling on an overhead lift.
MATERIALS
- 4 pieces of OBS/particle boards (4´ x 8´ x 5/8″).
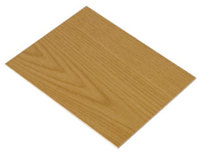
- 2 pieces of pine, smooth maple or oak plywood (4´ x 8´ x 3/8″).
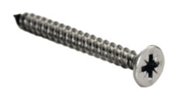
- Box of 3 1/2″ long lag screws (these are also used to bolt your rack to the platform; make sure the screw diameter fits the holes in the legs of your power rack).
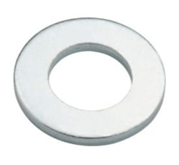
- 8 washers.
- 2 unidades de alfombra gruesa de caucho (244 x 61 x 2 cm).
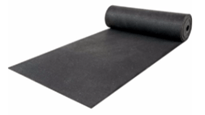
- 2 pieces of thick horse stall mats (4′ x 6′ x 3/4″).

Note: If you don’t have a truck or van to transport the full-size pieces of particle board and plywood, you can rent one for $20 per day on sites like Home Depot.
Note: In the list of materials mentioned, instead of buying 2 pieces of 3/8″ thick plywood, it is also worth buying a single piece of 3/4″ thick plywood with the same length and width. In fact, this would be ideal, but I can’t find it in any DIY store because they don’t make it. So as an alternative, you can buy two and place one on top of the other when assembling the platform.
Note: Regarding the horse stall mat, the dimensions mentioned can be made by cutting the pieces from a roll of 3/4″ thick carpet with a cutter. When buying it, make sure that the total length of the roll is enough to cut the two pieces of 8´ in length. If you cannot find a 3/4″ thick roll, a 3/8″ roll could be fine, and instead of cutting two pieces, cut four so that one goes on top of the other to add up to 3/4″ of thickness. Again, I repeat, make sure that the roll is long enough to cut the four pieces.
TOOLS
- Power drill
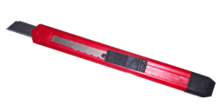
- Cutter
- Chalk line
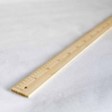
- Ruler

AND WHERE TO BUY ALL THIS MATERIAL?
Obviously the best places are the big DIY stores. And it all depends on the country you live in. In the United States, Walmart is very well known, but I imagine there are many more. In Spain, where I live, we can find stores like Leroy Merlin, Bricoking, Bricor or Obramat. I encourage you to investigate which site is the best for you to buy from, taking into account factors such as proximity to your home and the cheapest prices.
BUILDING THE PLATFORM
1 – Place the first layer of particle board.
Decide where you want your platform to be because once it’s there it’s hard to move it without unanchoring your squat rack. Place two pieces of particle board next to each other. Make sure there isn’t a gap between them.

1 – Place the second layer of particle board.
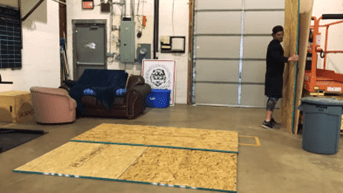
Place your second particle board pieces on top of the first layer in the opposite direction that you placed the first pieces. That is, make it perpendicular to the bottom layer. Here’s what it looks like finished:

3 – Screw the particle board together
Using your drill, screw the two layers of particle board together. Be generous with the screws; the more secure, the better. Place one in each corner and then a few screws down all sides of your emerging platform.

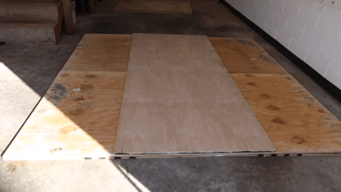
4 – Place and screw the plywood boards.
It’s time to attach the lifting surface. Take your piece of plywood and place it right in the middle of the plywood frame. You should have 2 feet or 61 cm of particle board on either side of the plywood (this is where you’ll place the rubber mat). Once you have that in place, screw it down to the particle board platform.
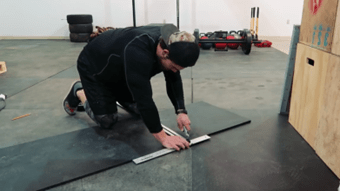
5 – Measure and cut the horse stall mat pieces.
Unroll the roll of rubber. Measure and mark a line 8´ long and 2´ inches wide. This will give you the first piece for one side of the platform. Use chalk and a ruler to draw a straight line down the mat to use as a guide for cutting.
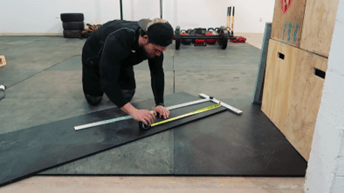
Using your cutter, cut along the marked line in the mat along the chalk line. For a straighter cut, you can use a ruler to guide the blade along the chalk line.
Once you make the score mark you will need to elevate the mat on a sawhorse or a higher surface such as a table to finish the cut.
Repeat the entire process again to cut the second piece on the other side.
6 – Place the stall mats and secure them by screwing them in place.
Take your two freshly cut 8´ x 2´ strips of stall mat and place them on either side of the plywood, starting at the front of the platform. They should fit snugly into the space where the particle board is exposed. There will be a rough edge where you made your cut. We placed the rough edges of each piece facing the plywood, so that we have a nice clean look along the edge of the platform. Screw the mats to the particle board below.
You’re probably thinking, “What should I do with my leftover matting?” Great question. It can be used for a number of things. For example:
- Cut the excess into three 1.5 metre long strips and place them on top of each other just behind the platform so you can position your squat rack if you don’t want to screw it to the platform and prefer to have more space for your lifts, or to the side of the platform so you have the rack where you store the weight plates closer at hand.
- Cut everything into squares about 2´ x 2´ and place them somewhere in your gym. You can stack some on top of each other and stand on top of them to perform deficit deadlifts. Or you can create two stacks to do block pulls. It’s all a matter of imagination.
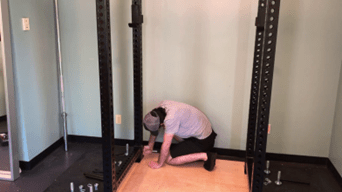
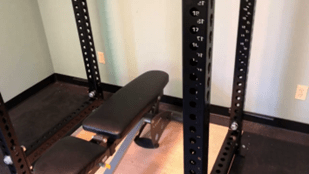
7 – Bolt the rack to the platform.
It’s time to bolt the power rack to the platform. Place your rack near the back of the lifting platform, on top of the plywood surface. You can either place it flush with the back or leave a little space between the back edge and the rack. Once you have the rack nice and aligned, drill a pilot hole for the lag screws, as seen below.

Once you’ve drilled the pilot holes, screw the lag screws through the holes in the “feet” of your rack using a socket wrench. Make sure to place two washers between the head of the screw and the rack. Repeat the process for the other three corners.
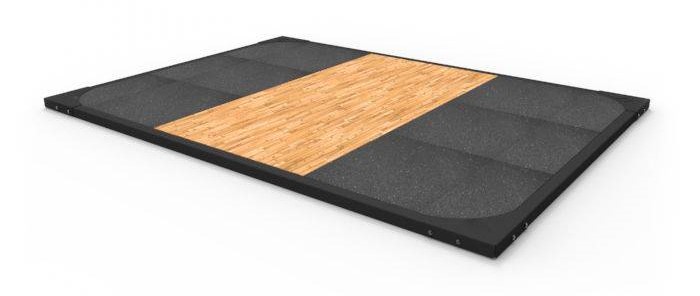
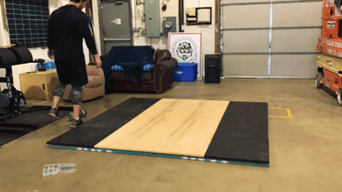
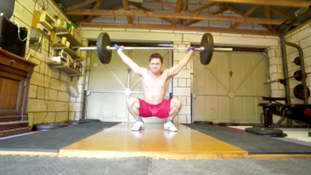
8 – Finished product.
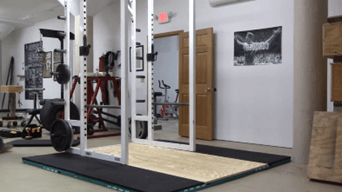
Voilà! Here you have a floor-saving, noise-reducing weightlifting platform that takes less than an hour to assemble. The maple wood in the middle gives you something solid to stand on, while the mats on the sides provide cushioning for your barbell weights.
Note: If all this text seems too tedious for you, in these videos you can see in motion how a weightlifting platform is built.
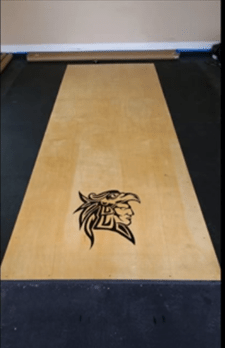
HOW TO PLACE A LOGO?
A popular thing for people to do is to put a vinyl logo on their lifting platform to give it a personal touch. Getting a vinyl logo is easy. You can upload and order a custom one from Fast Signs. It costs around $30 and applying the logo is easy. This company is based not only in the US and Spain, but also in several countries in Latin America.
In case you’re wondering, you won’t have any issues with the logo peeling off after you lift the bar on it. There are people who have a custom logo on their platform and have been lifting for years and it still stays attached. Also, there are no issues with the logo making the surface of the platform slippery.
Now you know how to build a weight lifting platform for your home garage. I hope you found these instructions helpful. Lift strong and stay fit!

Bibliographic references:
- McKey B. (2016). How to Build a Weightlifting Platform. The Art of Manliness. https://www.artofmanliness.com/health-fitness/fitness/how-to-build-a-weight-lifting-platform/
- Coop Mitchell. (2022). DIY Weightlifting Platform with Squat Stand Attached. Garage Gym Reviews. https://www.garagegymreviews.com/diy-weightlifting-platform-with-squat-stand-attached
- Meggers P. (2022). How to Easily Build a Lifting Platform. Testify Strength & Conditioning. https://testifysc.com/articles/how-to-easily-build-a-lifting-platform
- Meggers P. (2023). DIY Lifting Platform – Easy and Fast! Testify Strength & Conditioning. https://testifysc.com/articles/diy-lifting-platform-easy-and-fast
- Szatmary J. [Szatstrength]. (2017). HOW TO BUILD A WEIGHTLIFTING PLATFORM [Video]. YouTube. https://youtu.be/Cef_m3nOQOo?si=4899mV52j6gUbYBL
- The Gym Gypsy. (2014). Garage Athletes: How to build a Platform [Video]. YouTube. https://youtu.be/XMJbcH2nxdM?si=a4hBpWFkfi72yBGq

Leave a comment